Streaming HDTV with “SubWave”: An HDHomeRun Plugin for Subsonic
Thanks to a request from a listener on the Home Gadget Geeks Podcast, I have written a plug-in package for Subsonic that makes it easy to stream live television over the web for those using the SiliconDust HDHomeRun Prime

 SubWave 1.0 for Subsonic/Madsonic Mediaserver
Author: Christian Johnson
Release Date 8/17/2014
Download Link: Click to Download
Note: An updated download link with the Madsonic modification will be posted soon.
Installation Instructions
Prerequisites Before beginning plugin installation, ensure your HDHomeRun is already properly setup and configured on your network. Make sure you also know what IP address the device is using on your network – and ensure its address does not change over time. The easiest way to do this is to add a DHCP reservation for the MAC Address of the home run so that it will always be assigned the same IP address. To make sure you have the right IP address of the device, visit http://your_ip_address and you should see the HomeRun summary webpage.
Installation Download the plug-in and unzip it to a location on the Subsonic server. If you have yet to install Subsonic, follow the guidelines for your distribution here. Make sure you are using Subsonic 4.8 or later for best results with this plug-in. Please note this plugin does not support 5.0 beta1 – it is recommended to use Subsonic 4.8 or 4.9
Channel Generation
[UPDATE 10/25/2014]: I have provided the source file to do the Channel Generation using Java so that Linux users don’t need to use .NET. Just compile the Java source file or run it in Eclipse to get the same output as if you were to use the .exe we included previously. You can get the file here
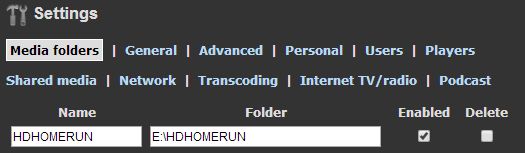
You will first need to run the “Channel Generator” executable on a Windows machine that has .NET framework installed on the same network as your HDHomeRun device. Run the executable, and enter the IP Address of your HDHomeRun. This will generate a folder called “channels” containing all of the channels in your local TV line-up. Copy the contents of the channels folder to a media folder that can be scanned by Subsonic. To configure this, login to Subsonic and go to Settings –> Media Folders, and add an entry with the location of the generated channel files.
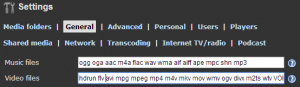
After you have added the channel files, go to the Settings –> General tab. Under Video files, add the hdrun extension to the list of known file extensions for video formats and save changes.
Finally, go to the transcoding section and add the following transcoding option:
Name: hdrun > flv
Convert from: hdrun
Convert To: flv
Step 1: hdrunffmpeg -ss %o -i %z -async 1 -b %bk -s %wx%h -ar 44100 -ac 2 -v 0 -f flv -vcodec libx264 -preset superfast -threads 0 –
Step 2: (leave blank)
(copy and paste the transcoding string directly from this page).
Finally, make sure to re-scan your media folders to pick up the new channel files.
Installing the Plug-in Files
To install the plug-in files, you will need to make two modifications to your subsonic installation.
1. Place the hdrunffmpeg file in your transcode folder. The default location for this on Windows is usually C:\Windows\subsonic
2. The second file is a modified version of a core system file of the Subsonic installation called TranscodingService.class We have provided you with this patched file in the download ZIP which will replace the default file included in the Subsonic installation.
If you are using Tomcat to run Subsonic on Windows, replace the TranscodingService.class file from the extracted ZIP to the following location relative to the home directory of the Tomcat installation:
webapps\subsonic\WEB-INF\classes\net\sourceforge\subsonic\service\TranscodingService.Class
For example, my Windows Installation of subsonic on Tomcat with the above relative path is at:
C:\Program Files\Apache Software Foundation\Tomcat 6.0\webapps\subsonic\WEB-INF\classes\net\sourceforge\subsonic\service
Once you have replaced this file, make sure to restart the Tomcat server (via services.msc or manually).
If you are using the Default Windows Installer for Subsonic, the default path to replace the file is found at:
C:\subsonic\jetty\4046\webapp\WEB-INF\classes\net\sourceforge\subsonic\service
Make sure you restart the subsonic server for this installation type as well. Also note that the 4046 number may vary, but the rest of the path should be the same.
Finally, if you are using Linux for subsonic, you should be able to follow similar procedures to know where to replace this class file. This guide is biased to Windows users, but can easily be adapted for Linux users (with the exception that the Channel Generator application needs to run on Windows as of writing).
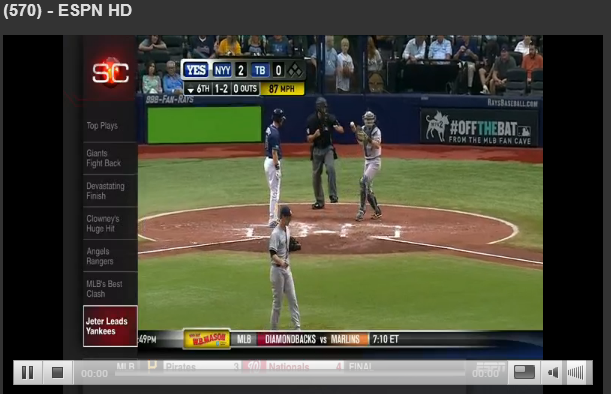
Finally, go back to your Subsonic website and view your channel listing. Click on a channel to start playing!
If you have questions or comments about the plug-in or guide, please email me at christian@theaverageguy.tv


thank you for this wonderful work. the channel generator program grabs the lineup from the homerun. my homerun at least, doesnt show all channels that are really available. i use mythtv in combination with schedulesdirect.org to grab my full channel lineup. do you know of any way to manually and in bulk, create 400 or so unique .hdrun channel files? i have already tested creating a few files and they work perfectly. i think i can possibly use excel to load my data, then use a vbscript to create a file for each row, i just wanted see if you had thought about this yet.
thanks,
Doron
Hi Doron,
Thanks for the shout out! Can you help me better understand what you are trying to do manually and then in bulk? The channel file format is simply creating a blank file with the file name that best describes the channel, and then the actual contents of the file being:
ip_address:channel_number
You can easily create an Excel files with the title, ip, and channel number as you want to customize it and then use your vbscript to create the files for each row. You can also easily access the lineup from silicondust by going to http://ip_address/lineup.xml
Hope this helps! I will also post a java version of the channel lineup for Linux users. –Christian