The Drobo with Windows 7 / Head to Head with a WHS?
Have you been looking for a better way to back up your data other than an external hard drive? So have many others. Over the last 3 years, Microsoft has been developing and supporting a product to help you with not only backing up your PCs, but assist you with some network file sharing. It’s called a Windows Home Server (WHS).
Admittedly, I am a WHS enthusiast, blogger and podcaster and have a vested interested in the product. In November, Microsoft pulled the Drive Extender (DE) functionality from the product and left the WHS community reeling. Much of this has already been document on this topic and if you have fallen behind, here is a must read to catch up. The short of it, is that the ability to use multiple hard drives in a single PC and have them seen as one volume and managed as a pool of drives is not longer going to be supported by Microsoft in the near future. For WHS enthusiasts, this was a blow!
It begged the question, could there be something else that has similar functions and features of DE in WHS that I could use? Could I replace DE in my WHS with something else? With a little thought, a Drobo looked like a good candidate, so I contacted them, acquired some hardware and wrote these posts at the HomeServerShow.com.
While writing these posts, it became apparent that I might be able to replace the WHS completely with a Drobo and Windows 7 native functionality. If that was the case, it deserved a look. This is that journey.
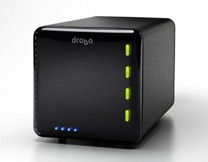 The first Drobo was released in 2004 and was similar to the model I am reviewing here. In the last 6 years, Drobo has expanded their line of devices to include models with faster transfer speeds, more drive bays and different ways to connect to your network. For the purposes of this review, I have a 2nd Generation Drobo (current retail is between $299 and $399) and am using the USB 2.0 connection to my PC. You can find more info on Drobo and their other products at http://drobo.com/.
So to give it a fair shake, here the major features of a WHS.
The Windows Home Server’s main features (from Microsoft)
| Media Server | Store and organize digital memories and media in one central location. Stream the digital content to Media devices. |
| Backup Software | Effortlessly backup your home computers daily and automatically. |
| Data Recovery | Easily restore lost files or even entire hard drive contents in a few steps. |
| Document Management | Get complete access to files from both inside and outside the home. |
| Remote Access | Share photos and home videos with friends and family with the built-in secure and personalized website address. |
| Add-ins | Easily extend the capabilities of the Server using software add-ins. Expand storage capacity easily as your needs increase. |
Let’s look at each one of these areas and see where the Drobo lines up. First, we need to get the unit installed.
The Drobo and Management Software Install
In the box comes:
1. The Drobo (wrapped in a black cover that could be used later as a dust cover)
2. Power Cords, USB and Firewire 800 Cables
3. A resource CD and Documentation (the book is actually handy!)
Set up and configuration is simple. Pull all the contents out of the box, plug in the Drobo and it comes to life. I connected the unit to my PC via USB 2.0 (I don’t have a Firewire 800 port on my PC) and installed the software from the provided CD
The install is very easy. Double click on the install icon and select all the defaults. Here are some of the screen shots:
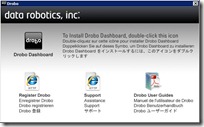 | 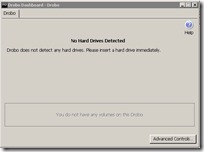 |
One the install is complete, the unit is ready to accept drives.
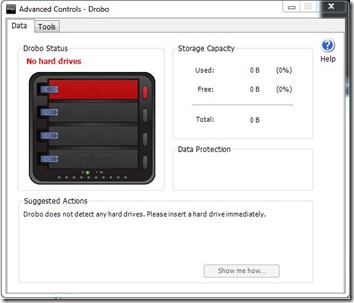
If you select Advanced Controls, you see a view of the Drobo and it’s drive status. In this case, drives need to be added.
I have 2 x 1.5TB Western Digital WD15EARS Drives and 2 x 1TB Western Digital WD10EARS Drives that will get inserted into the Drobo.
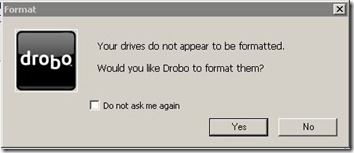
When I inserted the first drive (1.5TB) into the top slot, the Drobo prompted me format the drives and to create a volume.
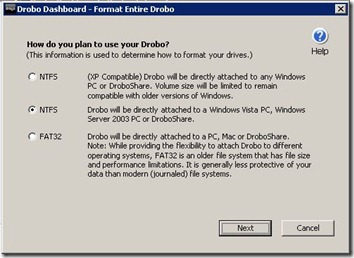
Selected NTFS for Windows Vista PC
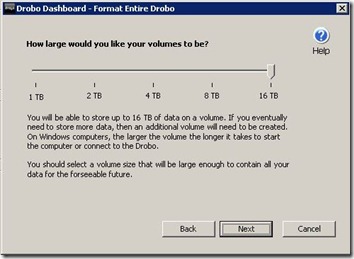
Created a 16TB Volume
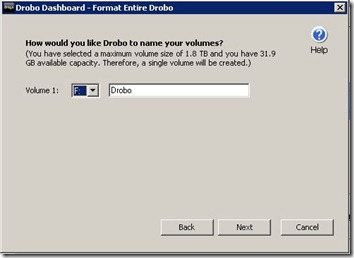
Selected a Drive Letter. I took the default.
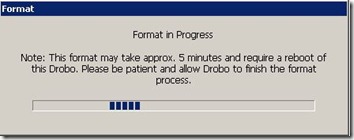
It formatted.
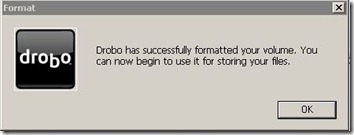
Success!
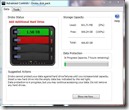
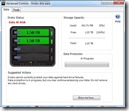
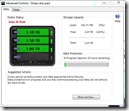
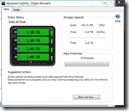
One thing to remember is that even though the Drobo creates a 16TB partition, it doesn’t mean you have 16TB of available space. That is determined by the number and size of drives you put in. So let’s put some drives in the box. Below are the screen shots from each drive.
[Click on each of the images for a larger view]
Capacity images were created using Capacity Calculator at Drobo.com
 |  |  |  |
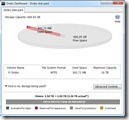 | 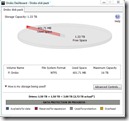 | 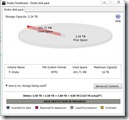 | 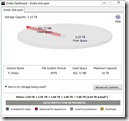 |
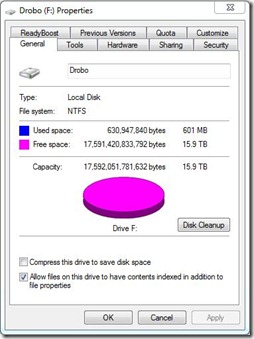
So with all four drives loaded, I have 3.15TB available out of the 4.54 of actual space. The space not available is used for data protection. Here is a look from the Drive Properties in Windows.
So now we have 3TB of space for data that is redundant and protected. What can we do with it besides use it like a regular external drive? Let’s look at how it would match up to the features of a Windows Home Server.
The Media Server – Store and organize digital memories and media in one central location. Stream the digital content to Media devices.
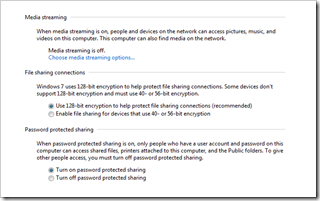
The first step in the process is to get the sharing permissions correct so that we can share files and folders across the network. For the purposes of this review and simplicity, I am going to choose the least complex security and allow all users to access all network shared drives. There are several options that need to be changed in the control panel of Windows 7
On the PC that is going to host the Drobo, go to
Control Panel\Network and Internet\Network and Sharing Center\Advanced sharing settings
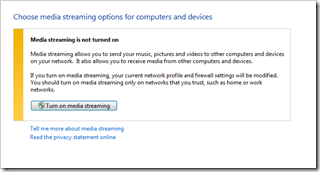
Select Choose media streaming options…
Select Turn on media streaming
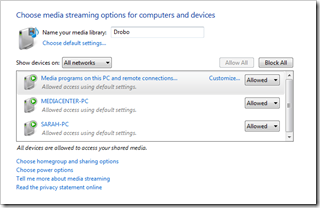
I changed the name of the media library from my PC name to Drobo. It added several PCs from my network to the devices that would be allowed to access my media. Select Ok.
To make sure that the other users on my network don’t have to enter a password, I am going to turn off Password Protected Sharing. It’s more complex of a set up to have it on and I am not going to cover it here, but it is possible to insure that each user has permissions to the media.
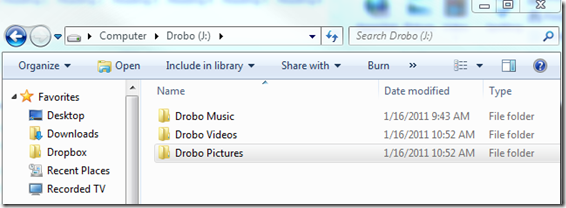
I created three folders on the Drobo. Music, Video and Pictures. So I could tell them apart when looking for them on various devices, I put Drobo in front of each title.
In Music, added music files and streamed both on the local PC and over the network.
In Video, added a file that had been recorded with my HD Homerun in over the air HD.
In Pictures, included a few pictures that were taken at CES. Was able to view them for various points on the network.
Since video would be most affected when adding and removing hard drives from the Drobo (or a real hard drive failure), I added a new drive during the playback of recorded TV. A the same, I was copying an entire DVD to the Drobo.
| Added a 1TB Drive to Bay 3 | Removed a 1.5TB Drive from Bay 1 | |
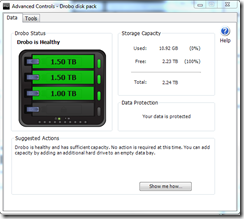 | 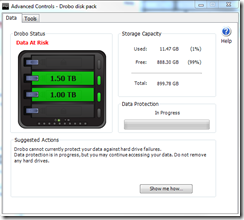 |
Once I pulled the drive from Bay 1, the Drobo began to going to action to move the data that had been on Bay 1 to Bay 3 for protection. During the back up, the video still played (although there was some skipping in the playback) and still had access to the music and pictures folders.
It would be safe to say that the Drobo can handle most of the media sharing ability that currently exist on a Windows Home Server. However, there are many factors that going streaming audio and video across a network so your experience may differ.
Backup Software – Effortlessly backup your home computers daily and automatically.
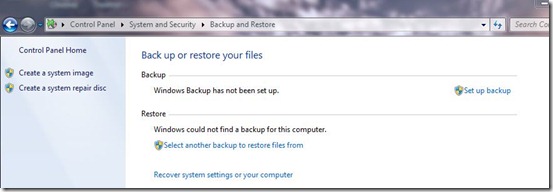
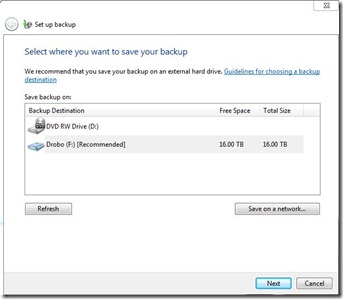
When the Drobo is directly attached.
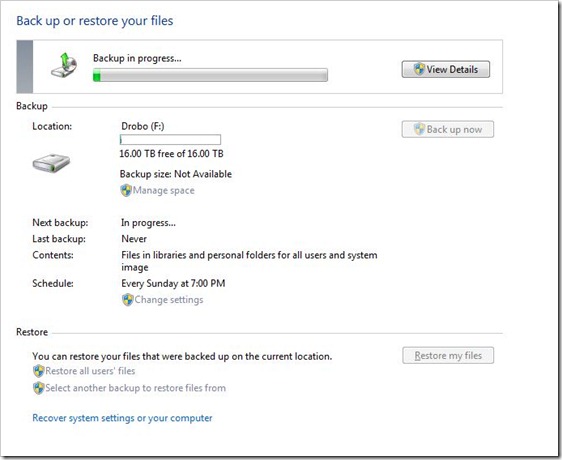
Select Set up backup
I will select the Drobo
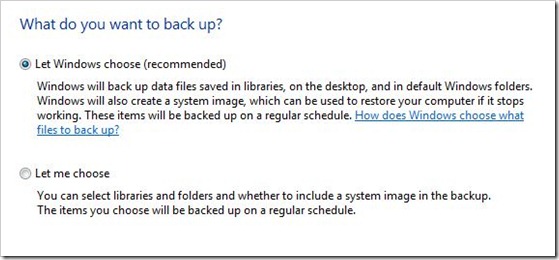
Choose the default method.
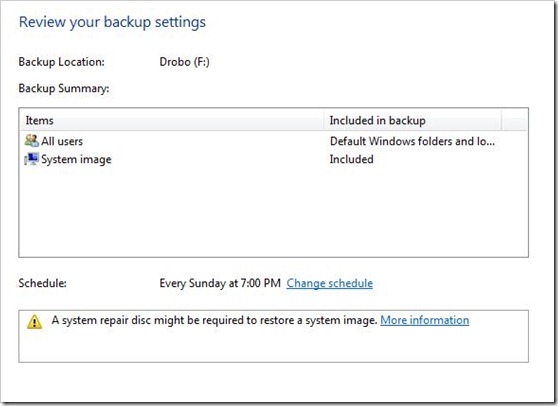
It gives me the option to review the settings.
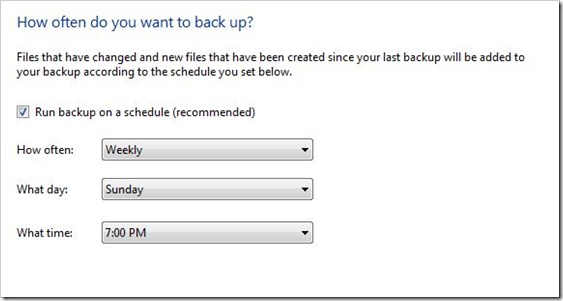
I could change
- The frequency (daily, weekly, monthly)
- What day of the week (blank for daily, day for weekly and number for monthly)
- What time it backs up each day, on the hour.
I then Selected Save setting and start a back up.
Once the back up is complete, the Drobo then contains a back up image. This image could be used to restore the PC in the event of a hard drive or loss of equipment. Simply use the System Restore CD that was created the first time a back up was made, boot the new PC with the Drobo attached and restore the image from the Drobo.
To back up other PCs on the network, I would simply create a back up folder that I would share across the network. When selecting the destination location, I would choose network and store it there.
Document Management – Get complete access to files from both inside and outside the home.
Remote Access – Share photos and home videos with friends and family with the built-in secure and personalized website address.
Let’s get two for one. We have seen from the Media Server section, document management (of things like Word docs and Excel files for example) is not any different than hosting music or video files. The real challenge would be the access of those file from outside the home.
This task is made very easy with the help of Window Live Mesh, part of the Windows Live Essentials suite of tool. Instructions to set up Live Essentials can be found here. Windows Live Mesh allows you to both remote control a PC or have access to the files that are on that PC from a remote location.
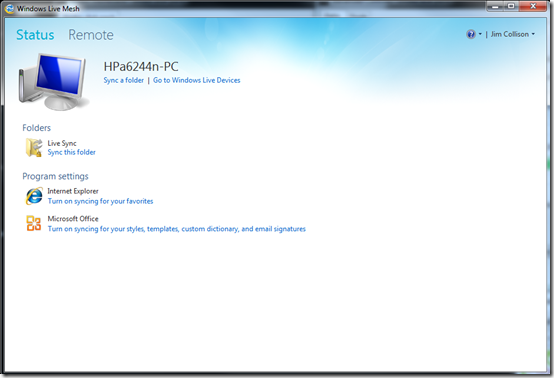
To set this up, First open and log into Window Live Mesh on the PC with the Drobo.
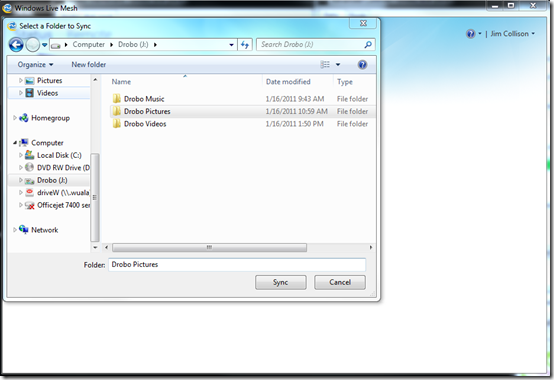
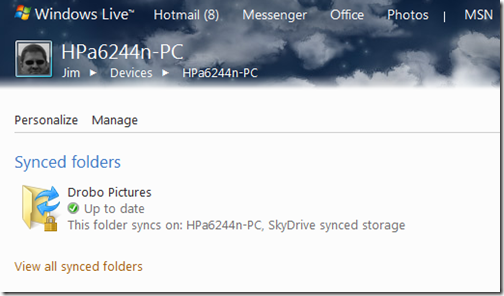
Then choose Sync a folder, found under the PC name. In this case, I am going to Sync the Drobo Pictures Folder. Select the folder and choose Sync.
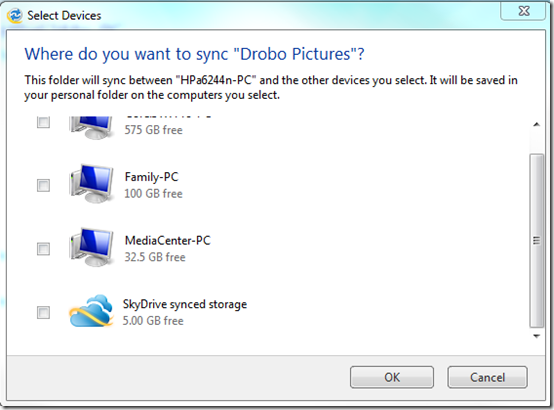
In this case, I am going to choose my SkyDrive storage. From there I could choose to share them with friends and family by using the share features that already exist with that product. I am limited to 5GB of total space with this option.
If you had files or pictures that you wanted to share with the same PC all the time, you could set the sync to go from PC to PC, say your PC to your parents PC. There would be no 5GB size limit in this case.
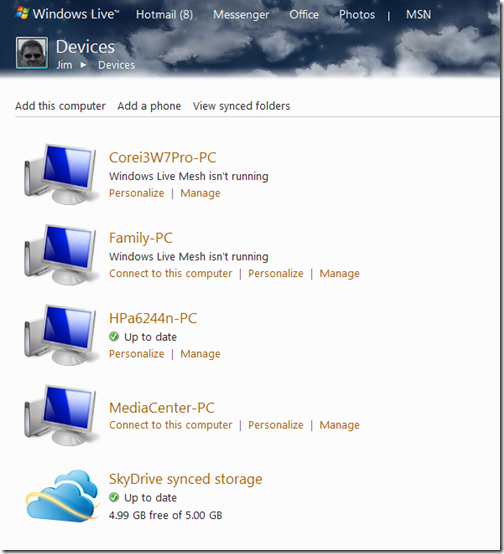
To view them on the web, go to https://devices.live.com and login.
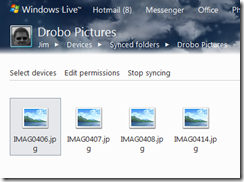
I would select the PC that hosts the Drobo, in this case HPa6244n-PC. Then choose Drobo Pictures.
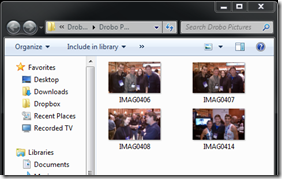
And there are my Pictures. I have include a screen shot from both the Drobo and the SkyDrive
| From the SkyDrive | From the Drobo |
 |  |
Add-ins – Easily extend the capabilities of the Server using software add-ins. Expand storage capacity easily as your needs increase.
One of the amazing features about the Windows Home Sever was it’s Add-in Community. The Add-in developers could extend the functionality and capabilities by writing specific applications on the Home Server platform. Many of these add-ins for free or very inexpensive.
Surprisingly, Drobo also has its own Apps that can be used with the Drobo. They can be found at http://www.drobo.com/droboapps/. There are apps for both the Drobo and the Drobo FS.
Here are an example of a few:
DroboApps Admin Utility
The DroboApps Admin Utility makes installing, configuring, updating, and uninstalling DroboApps even easier. It can temporarily disable a DroboApp to keep it from starting automatically.
Apache
Apache is a secure, efficient and extensible server that provides HTTP services in sync with the current HTTP standards.
Firefly
Firefly serves digital music residing on the Drobo FS to the Roku Soundbridge and iTunes.
Lighttpd
lighttpd is a HTTP server with a focus on security, speed, compliance, and flexibility.
Unfsd
UNFS3 is a user-space implementation of the NFSv3 server specification. It provides a daemon for the MOUNT and NFS protocols, which are used by NFS clients for accessing files on the server.
Conclusion
While not an exact replacement for a Windows Home Server in every way, a Drobo could replace most if not all of what is needed when using a Windows Home Server. Results can and will vary depending on one’s specific environment and there may be additional or other solutions that I didn’t consider in this post.
It should get you thinking!
Jim Collison is a blogger and podcaster for HomeServerShow.com and TheAverageGuy.tv.
Full Disclosure – Drobo provided an evaluation unit with drives for this review.



Test comment
Hi Jim, Mario from Drobo here.
Great post, one of the most thorough to appear from a reviewer; great balance of details and summary info for the average person!
Thanks for showing the continuous access to data in both directions even during a rebuild. HD playback is great when operating normally, and almost always great even during a rebuild. The infrequent combo of rebuild + read from storage + copy to storage had an affect on the read performance part on this model you reviewed, but data was always accessible.
Quick note on DroboApps, those apps that are available run directly on Drobo are for the Drobo FS model for SOHO use (and the DroboPro FS model for business). We have some utilities posted in our DroboApps area of the website for the Drobo model you reviewed, and those run on the system where the Drobo is connected.